I L.O.V.E. February

February was a very inspirational month for me this year.  I am happily in love, but I have always LOVED valentines day.  Here are a few things I made this month to celebrate love.

Tissue paper heart candle holders inspired by pinterest.  I got the tissue paper at the dollar store and the candle holders at Michaels.  Over all, this cost me about $12.00.  Not too bad in my opinion.

This one was all my idea.  I bought the stickers at Michaels and just saved a few wine bottles.  My tip for this project is to soak your wine bottles for a long, long, long time in order to get the labels off.

This one was also inspired by pinterest (craftaholicsanonymous).  The canvas is an old top to an ikea coffee table.  For the letters I bought some thick scrap book paper and used the die cut machine at my work to get the perfect X’s and O’s. After I got the letters but I simply glued them onto the piece of wood.  I used tacky glue.

This is another project inspired by pinterest.  I used a deck of cards to make an extra special valentine for my sweetheart.  I put a different reason I love my boyfriend, Colin on each card.  This project was a little tedious since I decided to mod podge each reason onto each card.  If you wanted, i’m sure it would be cute to just write the reason on each card.

Restaurant quality hash browns

Stop buying frozen hash browns! They take forever to cook and are the silliest invention ever.  If you have potatoes and a cheese grater you can make your own home made hash browns that taste like the delicious ones you get from a diner.

What you’ll need:

– Large cheese grater

– Canola oil (or any type of light oil)

– Salt and pepper

– potatoes

Grate your potato onto a couple paper towels.  You will use these to squeeze all of the water out of the potatoes.  That is the KEY to great hash browns.

Ball up your grated hash browns into the two paper towels and squeeze over the sink.  You will be amazed at how much water comes out of those little tators. Then lay the squeezed hash browns onto a couple paper towels, depending on how much you are making and pat dry to get any excess water.  The dryer the potatoes, the better they fry. Add salt and pepper now.

Coat a frying pan in oil and lay your hash browns on the pan.  Use your hand to evenly distribute the potatoes (the thinner the hash browns, the faster they will cook, and the crispier they will get).  Cook for about 10-15 minutes, or until golden brown, then flip! (as carefully as possible) This is the tricky part.

After you flip, hopefully your hash browns will start to look like this. YUM!

To make sure the inside of the hash browns are cooked, I put my pan in the oven for a little bit.  Make sure you use an oven safe pan.  As you can see, I had to transfer my potatoes to a different skillet, since my big frying pan can’t go in the oven. Leave them in the oven for 8-10 minutes, depending on how much you are making.  Take them out, lightly salt, and serve!

Enjoy!

How I made my own wordpress header

For this post I give all the credit to Picnik, a free photo editing site.  I used the site to create my own wordpress header for my blog. It’s super easy.  Here’s how I did it.

1.) Went to Google and searched words like “plaid” or “stripes” to find images of those things to use as my background.  I made sure to view only the large images so that they were big enough to edit.  When I found one I liked I uploaded it to picnik.

2.) Once you have your image in picnik you want to crop the image to the right dimensions for your wordpress blog.  It will tell you in your appearance tab in your dashboard under header what the dimensions need to be for your specific theme.  I’m pretty sure all the themes will have different dimensions needed for the header.  Mine were 855 by 252 megapixels.  If you go to picnik you will see on the left side there is any area where you can make basic edits like cropping or adjusting the light.

3.) Once you have your image cropped it’s up to you with what to do with it.  There are many different fonts, stickers, and fun things to edit your image with.  You can see on the top of the picture above the different tabs you can go to in order to edit your photo.  I used mine to make some sort of logo for my blog, but you can do what you want with it.

4.) Then, the last step will be uploading it to your wordpress blog.  To do this you will go to your appearance tab in your dashboard.  Click on header.  There you will see where to upload it.  You can upload as many as you want.  You also have the option of turning off the text on the top of your blog, which I did so that you only see my custom header.

5.) and wa-la! You have your own custom made header for your wordpress blog.  Also, as you can see above I made quite a few and uploaded all of them.  This makes it easy to change the appearance of your blog, if that’s what you wish to do.

Hope this was helpful!

Photo collage

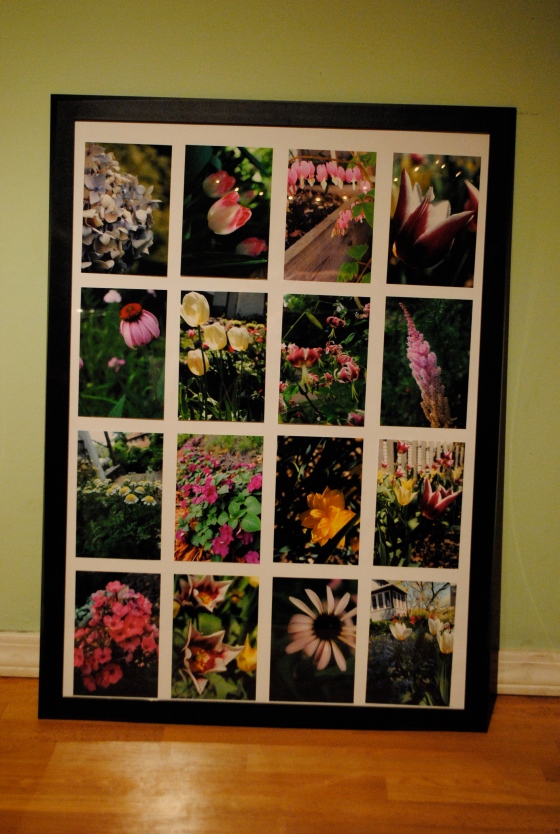
My mom loves to garden.  I love to take pictures.  The last couple times all of her flowers were in bloom I made sure to take some pictures.  I saw the idea to make a photo collage like this one a while ago.  This is my version I made for my mom for Christmas.


Supplies

– Black frame (I got this one from Ikea)

– 16 4×6 photos

– double sided tape

Directions

Get the photos you want to use developed.  Make sure how many your developing will fit into your frame.  Then tape or glue your photos onto a piece of paper that fits into the frame.  The frame I got came with a piece of paper in it, so I just used that since it was already cut to the right dimensions.

Total cost was probably under 10 or 15 dollars.  Developing the pictures was only a couple bucks, and the frame couldn’t have been more then 10.

Bag lunch

I was just scanning my pinterest and came along a post about foods you should eat everyday.  Things like dark leafy greens, nuts, whole grains, and fruit.  I am eating my bag lunch right now and realized almost all of the things I packed are foods you should eat everyday! Eating right is something that is always on my mind.  I always try and stay conscious of how many fruits and veggies I eat in a day, eat whole grains, and lean proteins.  Those are my three basic diet restrictions.  I don’t believe in dieting, but I do believe in living a healthy life style.  I  I didn’t think to post my yummy lunch until after I ate most of it…so no pictures.

– Main course: Whole wheat wrap with turkey, spinach, and 1 pack of skinny cow herb and garlic cream cheese.

– About two cups of grapes

– 1 chobani raspberry greek yogurt (my new obsession) They are so rich and creamy, but contain so much protein they keep you full for a long time. I love them.  I especially like the Chobani brand because they are all natural.  I bought the Dannon brand last week and it tasted a lot sweeter and contained fructose (which I believe is just code for sugar).

– 1 cup of roasted peanuts

– …and 2 chocolate kisses for good measure 🙂

– And always lots and lots of water.

And just a bonus for me…I’m eating this after a great workout. Feeling good!

YUM!

Yum – a clear and direct way of appreciating someone’s food.  I love this word so much that I made over-sized letters to go up in my kitchen (with a little help from a friend).  Just in case someone might forget how good my cooking is. haha just kidding…sorta… anyway here are my letters.  They were so easy to make!

This was a super easy and fast project.  My friend bought me the cardboard letters at Joann Fabrics, but I am sure they are available at all kinds of craft stores.  The only other two things I needed was tinfoil to cover the letters with and mod podge.  Then I just cut and ripped pieces of the tin foil to cover the letters with.  I got the shelf at Home Goods for about 12 bucks.  In total this couldn’t have cost more then about 20 bucks.  And they are so cute!

Supplies

– Cardboard letters (or wood ones would work)

– tinfoil

– mod podge

Hey Ya’ll!

I have finally created my blog I have been wanting to make for over a year.  Feeling good about it! I will be posting mainly photos, crafts, and food.  Not a big writer so I hopefully will keep that to a minimum.  Yippee! Super excited I made this!